Part 1
Stop right now! If you are my mom, or my husband's mom, DO NOT read any further! Turn off the computer! Walk away! If you read further, You will see your Mother's Day card. And I KNOW you don't want to mess up that surprise!
For the other handful of people that want to see what card I made for Mom's day, continue on!
I will start out by saying I totally and completely copied this card! I got the idea off of svgcuts blog. I saw a picture and copied it. I will also admit that I studied very carefully did NOT watch the tutorial until AFTER I made the card. Why? I was a bit impatient... and the computer kept freezing, so I did it on my own. Now that I've studied very carefully watched in fast forward, I would do a few things differently. But as you will hear on another blog post, I am still just learning how to use my new favorite toy... the cricut!... so I made lots of mistakes... but learned a lot too. So get ready for the journey as I show you how I, ummm... my kids and I... made this beautiful card! Just don't judge it against the one on svgcuts! Remember, they are the professionals with the download for the card that you have to buy and the really pretty paper, and I am the complete newbie that has only bought plain, cheap paper for the cricut!
So, here goes!
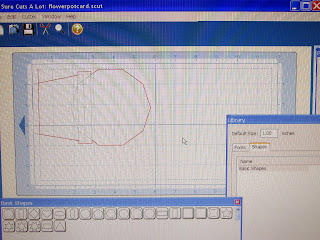
To start, I made the base of the card. I used the software program, Sure Cuts A Lot (SCAL) to make this, but it can easily be done by hand. In SCAL, I used some different shapes (trapezoid and rectangle) to make a flower pot with a decagon (10 sided shape) coming out of the top.
After cutting that out, I folded a card and used the negative image to trace on the card. Line the edge of the stencil with the folded part and don't trace or cut those lines. Then I cut out the card (by hand!). WHEN I do this card again, I would put the imagine in SCAL upright and then flip it, weld it together and the whole thing would be cut by the machine.


I found a free font of flowers and picked a few of those to cut out. I made one color one size, then enlarged it a little and made those flowers in a lighter/darker shade. I used the same template and cut it out on different pieces of paper. Here is a tip (sorry I didn't do a picture of this... ) Do the top row of flowers one size and a row on the bottom the other size and then use two different strips of paper to cut it out. Saves time. Another tip: make twice as many as you need, then keep the others saved for other projects.


No comments:
Post a Comment